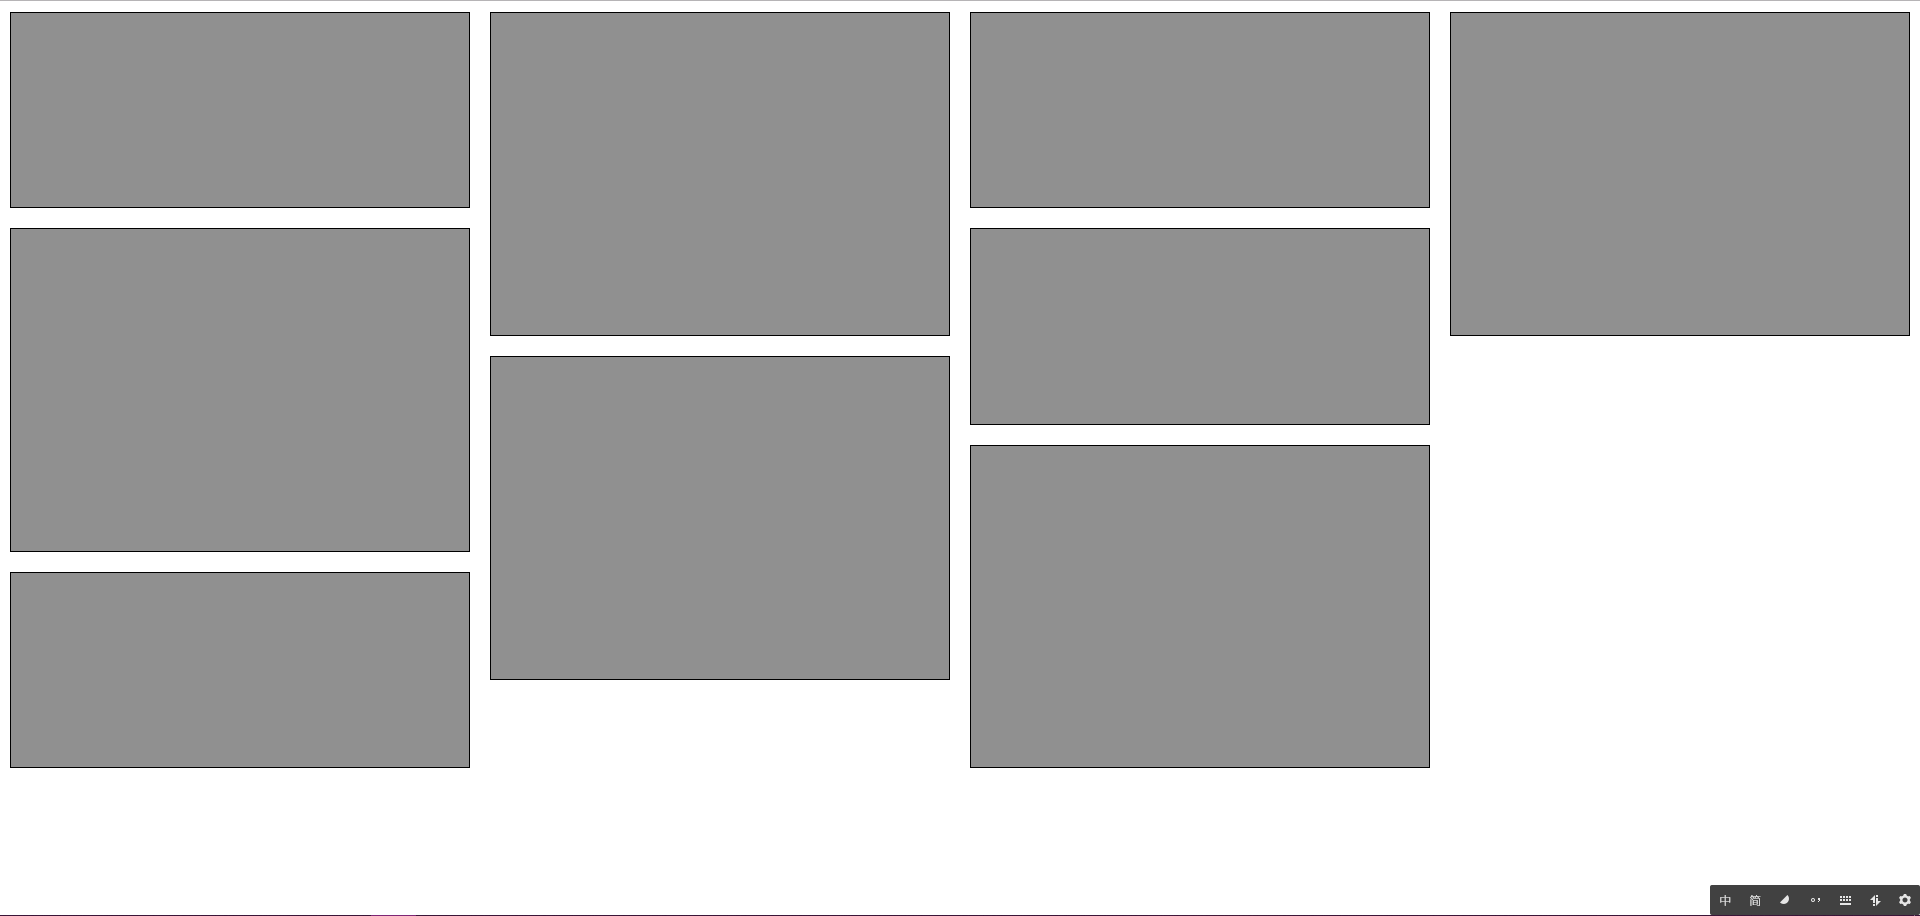
一堆等宽不等高的数据块组成的页面

2019-06-04更新
大概就是最近有个学姐的毕设做到了这个
但是对于瀑布流这个东西一直只有听说没有自己实现
初步了解下了可以通过js/css3/jQuery来实现,
先挖个坑,等课程设计做完了再来埋。
2019-06-07更新
开工啦!开工啦!
目的就是实现图 1 所示的布局
分为CSS3实现和JS实现
CSS实现
这一部分使用CSS实现瀑布流布局。
关键技术
Columns属性
-> 点这里查看文档
实现代码
HTML 代码
1 |
|
CSS 代码
1 | .box { |
相关介绍
column-count
-> 点这里查看文档
描述的容器元素的列数
column-count 的取值可以是:
-> <number> 严格的正整数,描述元素内容被划分的理想列数。而当column-width的值非零时,本属性值表示所允许存在的最大的列数。
-> auto 描述元素的列数依据其他CSS属性自动生成,例如根据column-width。
column-gap
一开始是多列布局中特有属性,后来在 Flexible Box 、 Grid Layouts 中也能使用。
column-gap 的取值可以是:
-> normal 在 Multi Column 布局中默认 1em , 其他布局默认 0 。
-> <length> 使用长度定义列间距,必须非负数。 关于<length> (其实就是1px,2em,3rem,4wh这些啦。
-> <percentage> 使用百分比定义列间距,必须非负数。
break-inside
break-inside 属性描述 Multi Column 布局中内容盒子如何中断。
大概原理就是当前元素内的中断点的位置。(因为没有找到较详细的参考文献,呜呜呜
例子中可以看到如下三条CSS代码,(没有查到很清楚具体的区别,根据经验来说是针对兼容问题的 break-inside 语句,但是和以往不同的是,出现了'-page-','-column-'前缀,与page-break-inside有一定相似度。关于page-break-inside。依据我查阅到的消息来看,break-inside 仅适用于多列布局(即 Multi Column 布局。而page-break-inside的适用范围更广,但是没有查阅到以下的三条兼容性代码的区别(呜呜呜,别骂了
- -moz-page-break-inside:avoid;
- -webkit-column-break-inside:avoid;
- break-inside:avoid;
break-inside 的取值可以是:
auto | avoid | avoid-page | avoid-column | avoid-region
那么区别是什么呢!
- auto: Allows, meaning neither forbid nor force, any break (either page, column or region) to be be inserted within the principle box.(MDN抄的,大概就是说不禁止也不强制插入中断,关于principle box这些概念不是很清楚。。。
- avoid: 这个简单,避免在元素中插入中断点,在本例子中,使用的就是该值
- avoid-page: Avoid any page break within the principle box.
- avoid-column: Avoid any column break within the principle box.
- avoid-region: Avoid any region break within the principle box.
除了avoid,其他理解起来比较痛苦,对于page、column、region以及principle box的概念有点模糊 救救孩子 。
但是本文!旨在实现瀑布流布局(摸鱼警告
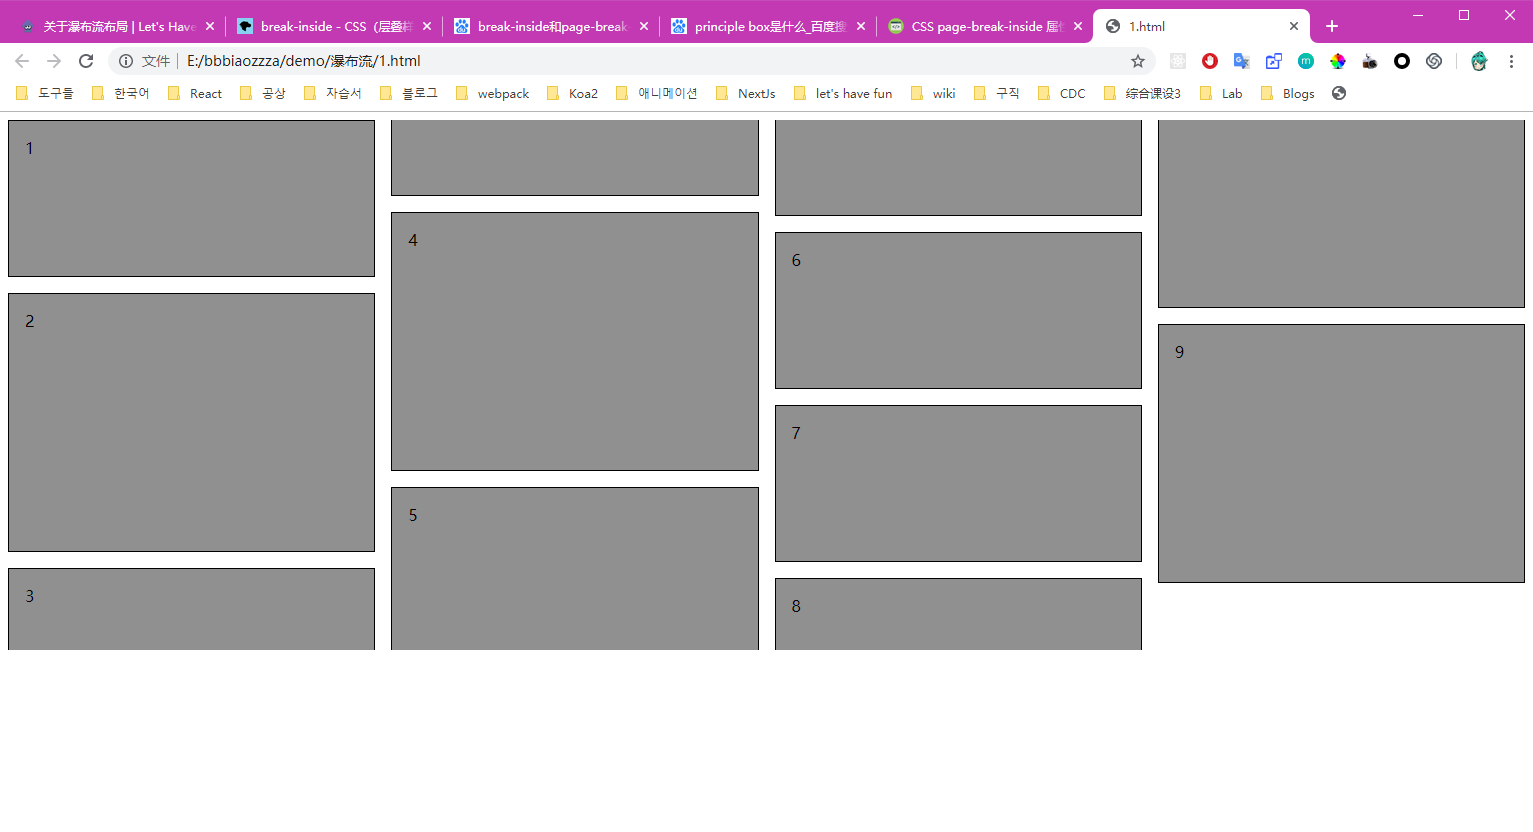
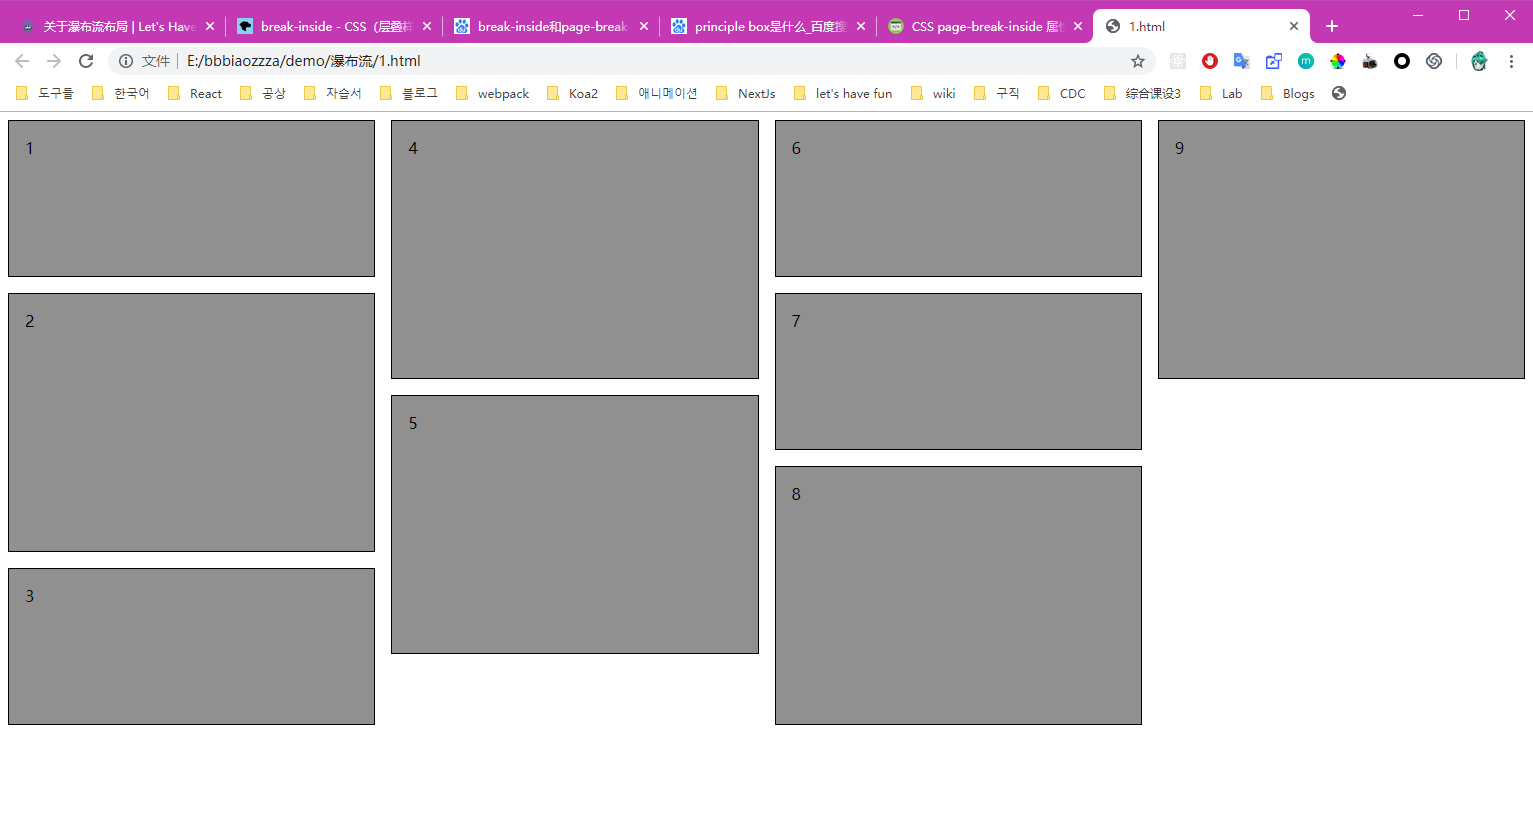
所以把五中属性都拿来测试了一下,测试得到的结果有两种,测试结果图如下。


结论:
取值为 auto | avoid | avoid-column 不会对列内元素进行拆分
取值为 avoid-page | avoid-region 会在元素内插入中断点进行拆分。
总结
整体的技术很简单(是真简单又好用,而且纯粹使用CSS实现。
하지만!
- 是 CSS3 的语法,需要做一些兼容处理。
- 其次还有一个问题需要考虑,可以在测试结果的两个图中可以看到,九个方块的顺序,是自上而下↓自左到右→排序的,但是通常而言,瀑布流的使用,往往顶部的内容会是最新/热度最高的。所以单纯使用CSS实现瀑布流,最顶端的元素的index不一定是最靠前的(这里我可能描述的不清楚,想表示的意思是在图3中,顶部的元素的index为1,4,6,9,而通常情况下,应该是1,2,3,4才对),拿已经排序好的data进行渲染时(这里指数组渲染,在ReactJS中很常见),就会出现本应该在下方的内容出现在顶端。(某种程度来说,这个缺陷挺致命的,解决方法呢!就是用js实现啦~
JavaScript实现
实现代码
HTML 代码
1 |
|
CSS 代码
1 | * { |
JavaScript 代码
1 | window.onload = () => { |
相关介绍
本栏目主旨是通过js实现waterfall布局,html代码与css代码与前一部分(使用CSS实现)没有太大的差异,所以HTML和CSS的代码可以查看上方代码进行对比,需要强调的是要设置容器的position:为relative,其他不做过多介绍。
waterfall()
整个程序的主函数。
实现的逻辑:
- 获取waterfall布局容器元素
- 获取容器元素的子元素集CHILDS
- 筛选出每个class为box的子元素(这里的说法只适合本博客中的例子
- 获取屏幕宽度
- 计算得到每行的元素个数
- 设置容器的width和margin
要注意的是 CHILDS 的类别为 HTMLCollection ,因此无法使用 filter() 函数和 for of 语句。
getHeights()
主要的业务逻辑函数
实现的逻辑:
- for in 语句遍历子元素
- 获取第一行的各列height并存入数组 HEIGHTS
- 通过 HEIGHTS 数组获得 height 最小的列的下标,通过修改当前元素(第一行之外的元素)的CSS值,加入height最小的列
- 加入之后更新HEIGHTS数组
- 遍历结束时,所有子元素的插入也就完成了
获取数组的最小值,使用了 Math.min.apply(Math,arr) ,相关介绍。
还有就是 offsetHeight 和 clientWidth 的应用,一直很模糊,参考了这篇文章。
浏览器宽度变动监听
很粗暴的当 window.resize 时,loaction.reload()。
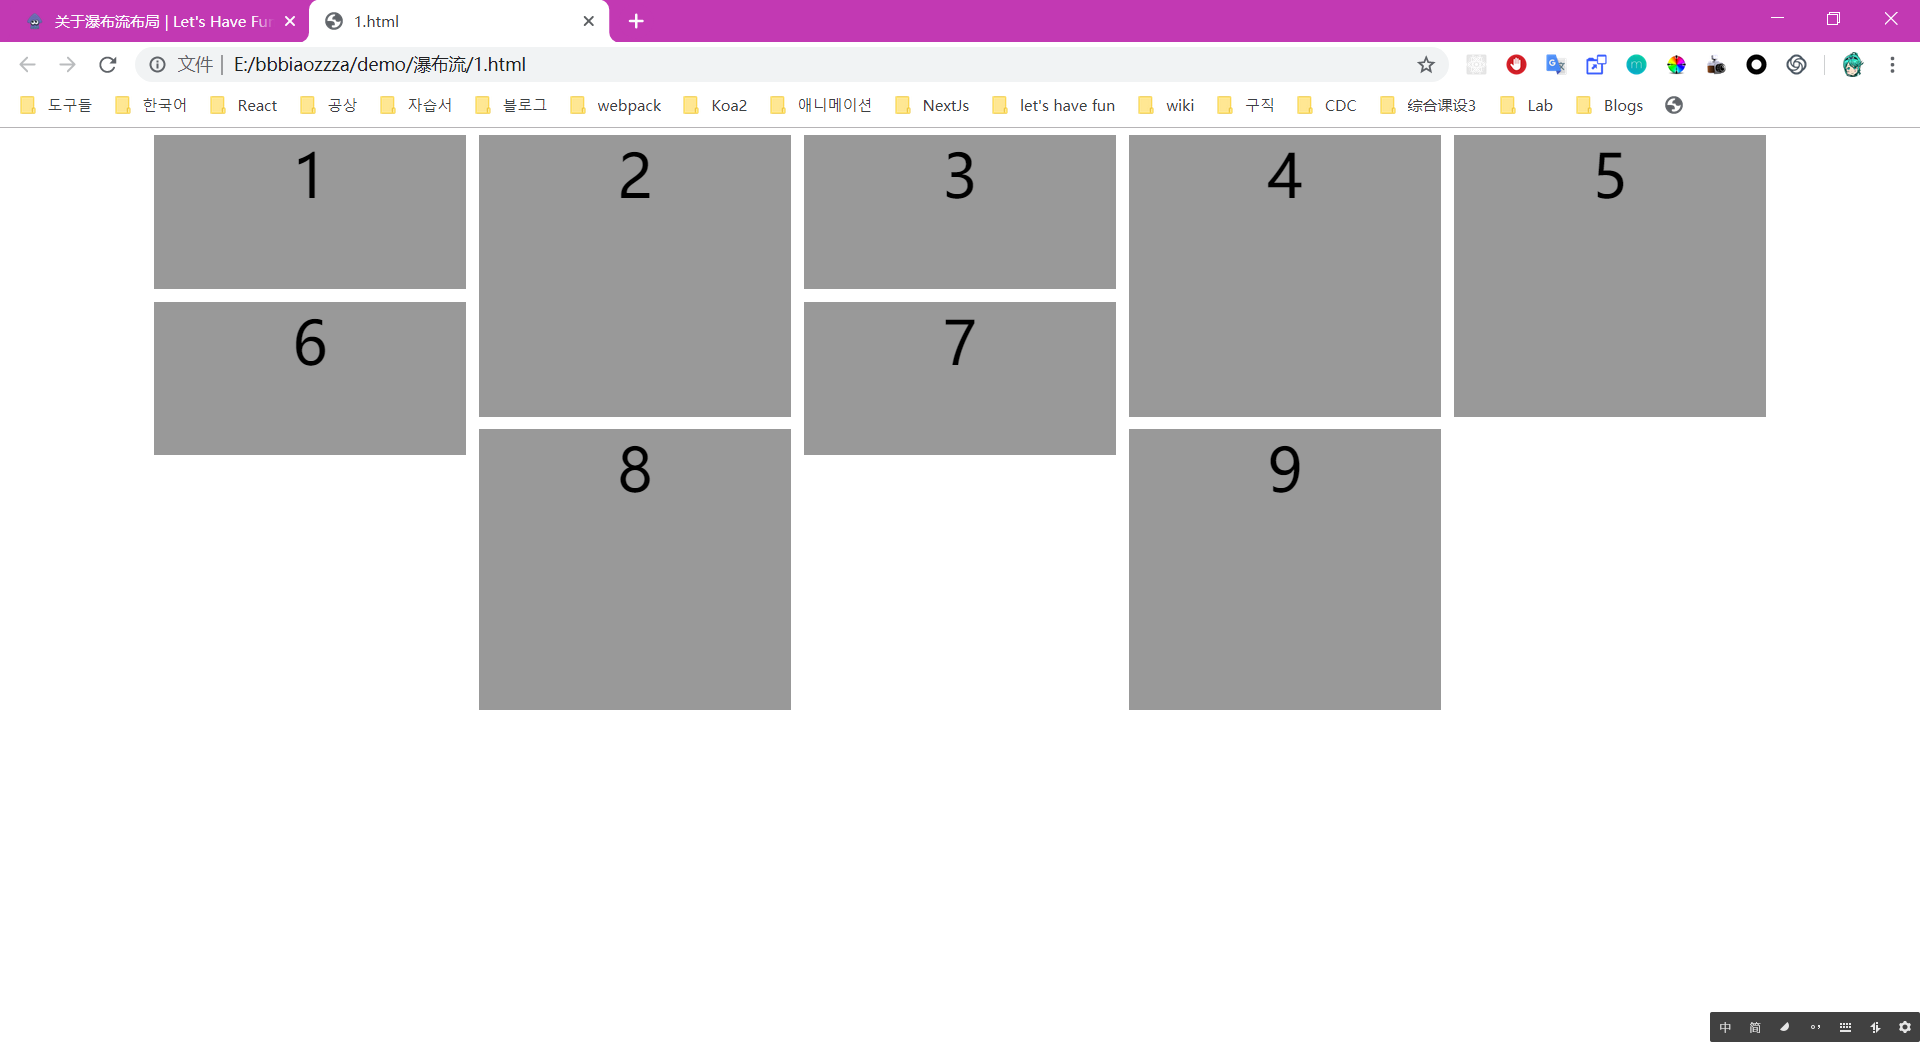
实现效果图

总结
- 获取子元素的宽度(每个子元素的宽度相同)以及浏览器宽度
- 计算一行有多少个元素
- 遍历子元素,往最短的那一列的加元素,加元素的具体实现就是修改元素的top和left值
- 加一次元素更新一次每列的height值,就可以实现瀑布流布局
因为js的实现比较正统,可以拓展的业务比较多,我!勇敢的打算摸鱼了(天天划水身体棒
- 滑动加载(更适合移动端
- 浏览器宽度变化局部刷新页面(在例子中粗暴的监听到浏览器宽度变动,一变动就全刷新
- ReactJS工程中实现
文章总结
通篇以CSS和JS实现了瀑布流布局
开头的时候说到可以使用JavaScript/CSS/jQuery实现
为什么没有用jQuery呢?
- 懒
- 对jQuery没有那么熟悉(学jQuery都是两年前的事了,学了之后,就没在实际项目中用过… ReactJS多好啊! 嘿,嘿嘿嘿
- 在大环境下jQuery已经没有那么高的需求了(个人意见…个人意见…
而CSS和JS的两种实现方法对比而言,差距还是很大的啦,大概有辣么大,可以说不用动脑子就可以使用CSS实现瀑布流布局,但是局限性在之前的栏目总结中提到了,感觉还是很致命的。而JS的实现,大概就是获取一下DOM元素再获取下元素宽度、浏览器宽度、最后在使用JS更改元素的绝对位置,个人感觉使用JS修改CSS不算是一种DOM操作吧(如果其实是的话,就是吧hhh单纯是我菜了。 所以感觉(只是感觉!感觉!!)在ReactJS中使用js的方法实现瀑布流的布局不会有什么局限性(或者说排斥性?当初刚学ReactJS总想着进行一些DOM操作。。。console栏中一片黄色warning QAQ
所以之后会在实际的ReactJS项目中应用下waterfall布局,正好实验室也想做一个搜图片的搜索引擎应用。
하지만!
并没有说CSS的实现方法不好的意思,看实际应用场景惹。谁不喜欢简单易实现的东西(明示期待一键生成代码
综上!祝大家新年快乐
今天是端午节
端午安康!